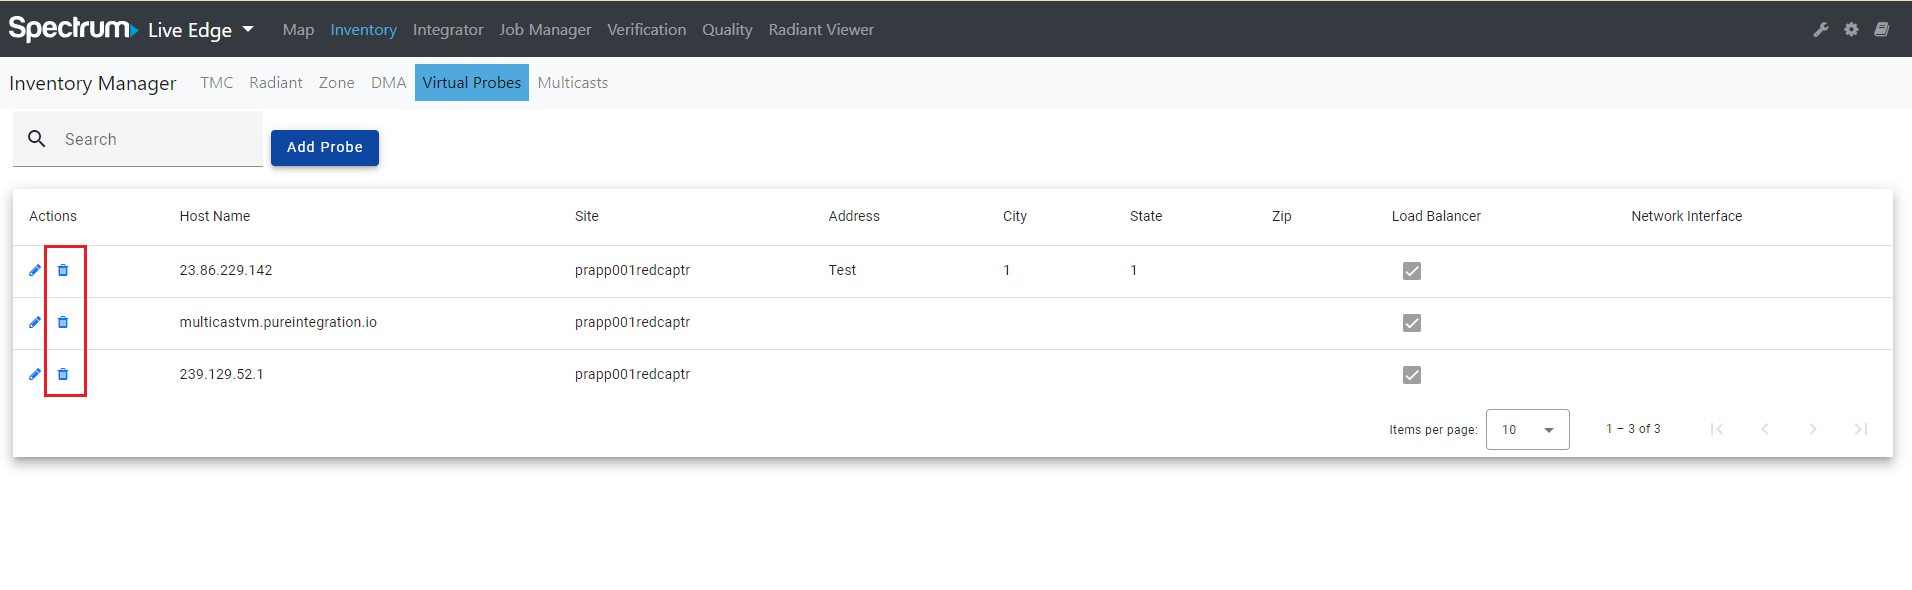
Virtual Probes
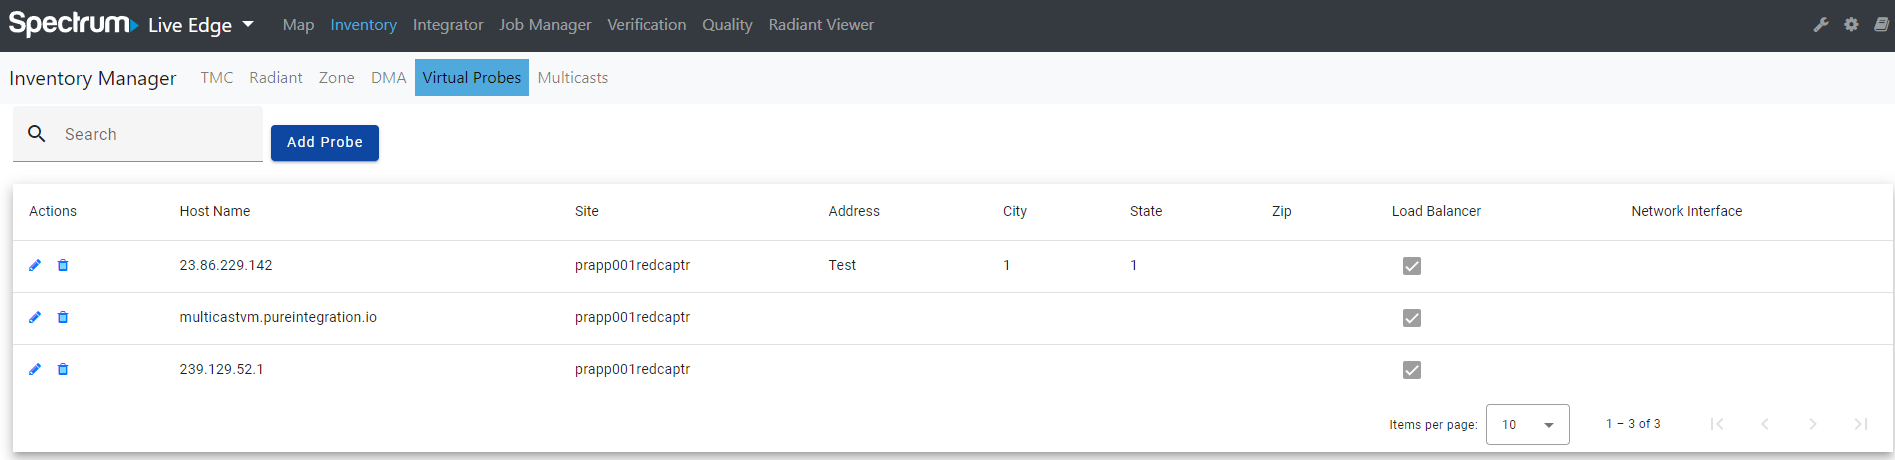
The Virtual Probes page displays a table with information about the multicast probes and allows users to add, edit, and remove them.
The table includes the following fields:
- Actions
- Host Name
- Site
- Address
- City
- State
- Zip
- Network Interface: the interface to listen/capture
- Load Balancer
Search
The Search field applies a generic search across all columns and return any items that have a match.
Add Probe:
Clicking the “Add Probe” button to add a new multicast probe. An “Add Virtual Probe” modal should display with the following fields:
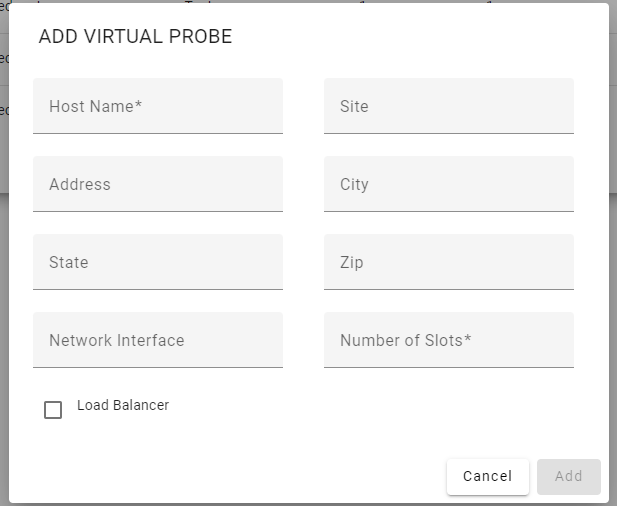
- Host Name: the IP address or Hostname and Port
- Site: the Site name
- Address: the Address of the Probe
- City: the City of the Probe
- State: the State of the Probe
- Zip: the Zipcode of the Probe
- Network Interface: the interface to listen/capture
- Number of Slots: the total number of Virtual Slots that can be used for captures
- Load Balancer: a toggle that will allow us to identify which Virtual Probe will serve as a Load Balancer and which is just a traditional Virtual Probe
- Add button (This button is greyed out unless all of the required fields are populated)
- Cancel button
Edit Probe:
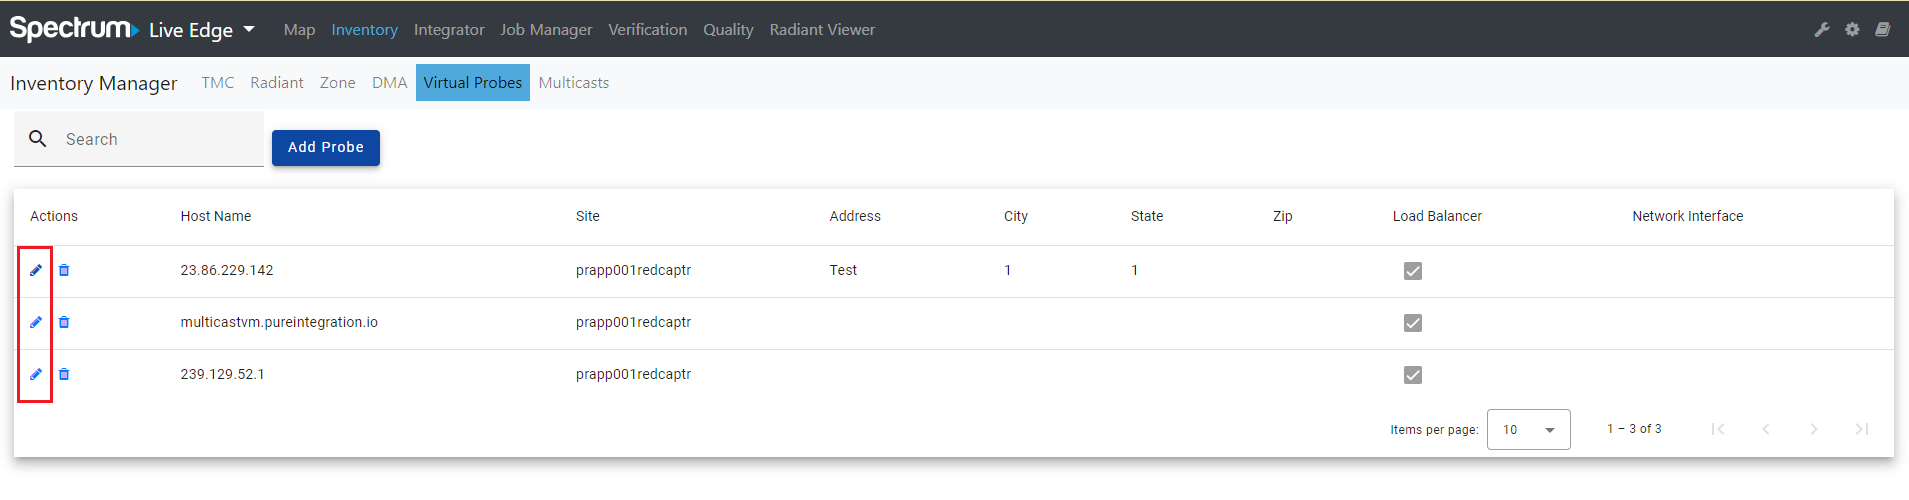
Users can click the “pencil” icon in the Actions column to edit a multicast probe.
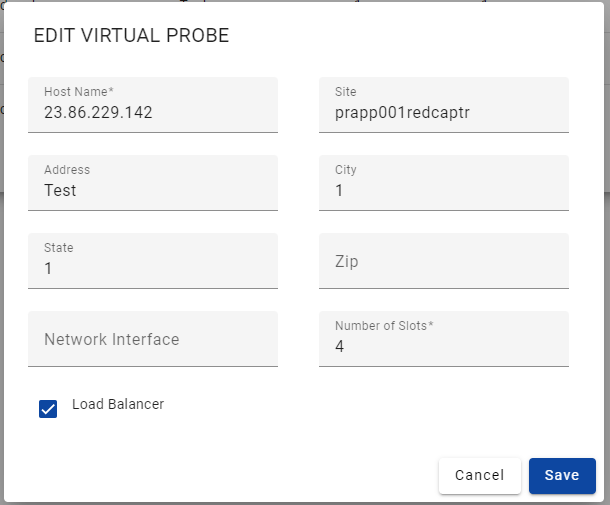
An “Edit Virtual Probe” modal will be displayed with the same populated fields as the “Add Virtual Probe” modal. Instead of the “Add” button, there is a “Save” button.
Delete Probe:
Users can click the “trash bin” icon in the Actions column to delete an existing virtual probe.
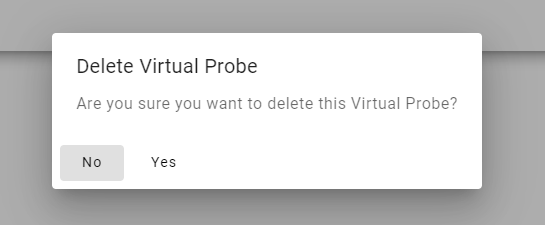
A “Delete Virtual Probe” confirmation message will appear. Click “Yes” to delete a probe or “No” to cancel.