Home
Description
The defalut view or home view, shows a summary view of configured jobs and their corresponding job states. This view is used to monitor and configure running jobs in Live Edge.
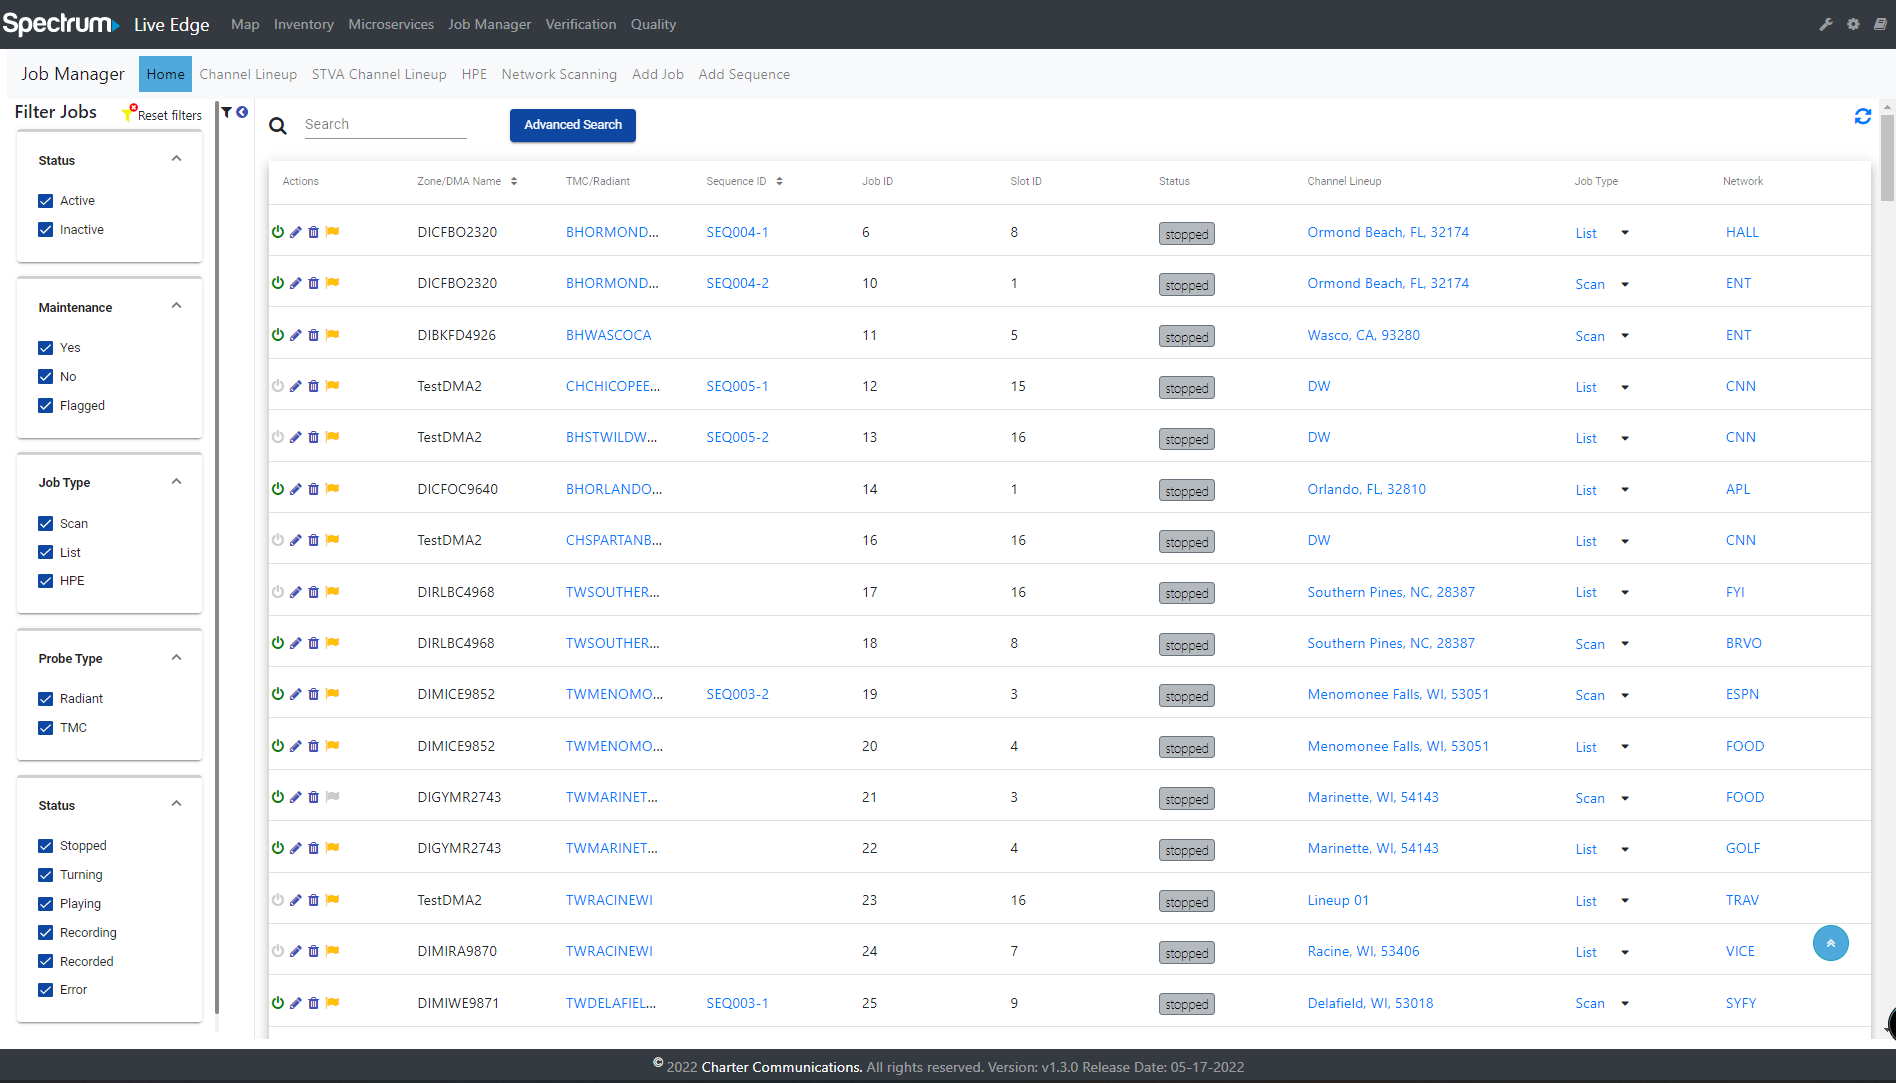
Action
The Action flag both indicates if the job is being used and can be clicked to enable or disable the job.
Zone
The zone field displays which zone the Job Manager is monitoring.
TMC/Radiant Link
The TMC/Radiant Link can be used for loading the TMC Manager into a new browser tab.
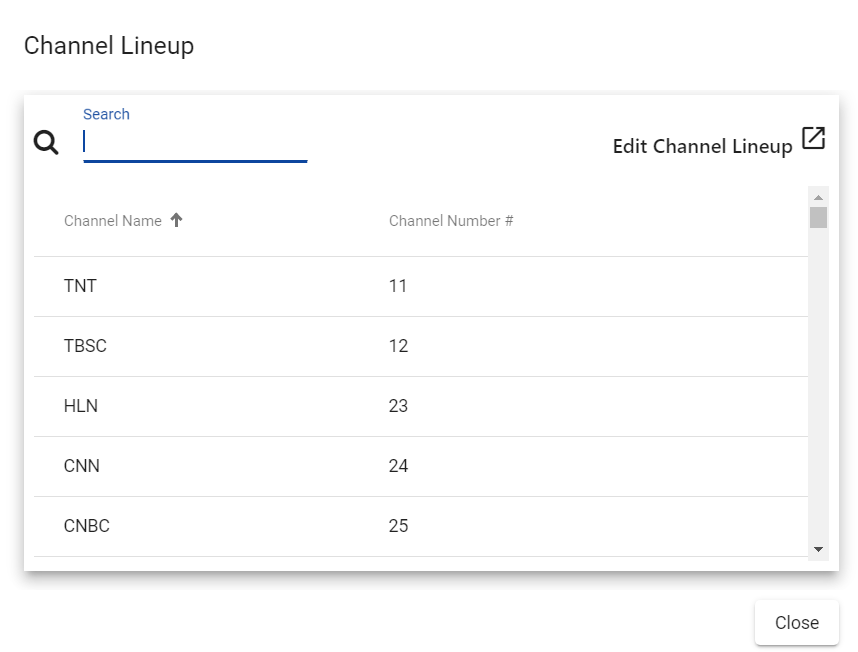
Channel Lineup
The Channel Lineup button is used to manage system channel lineup as the modal window.
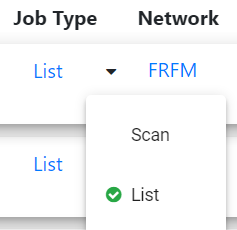
Job type
The Job Type that allows users to use jobs according to Network List or Network Scanning is called List and Scan
Network
The network column shows the channel that has just been used.
Clicking Network will open a new tab and it will show the results of the Verification jobs of that network.
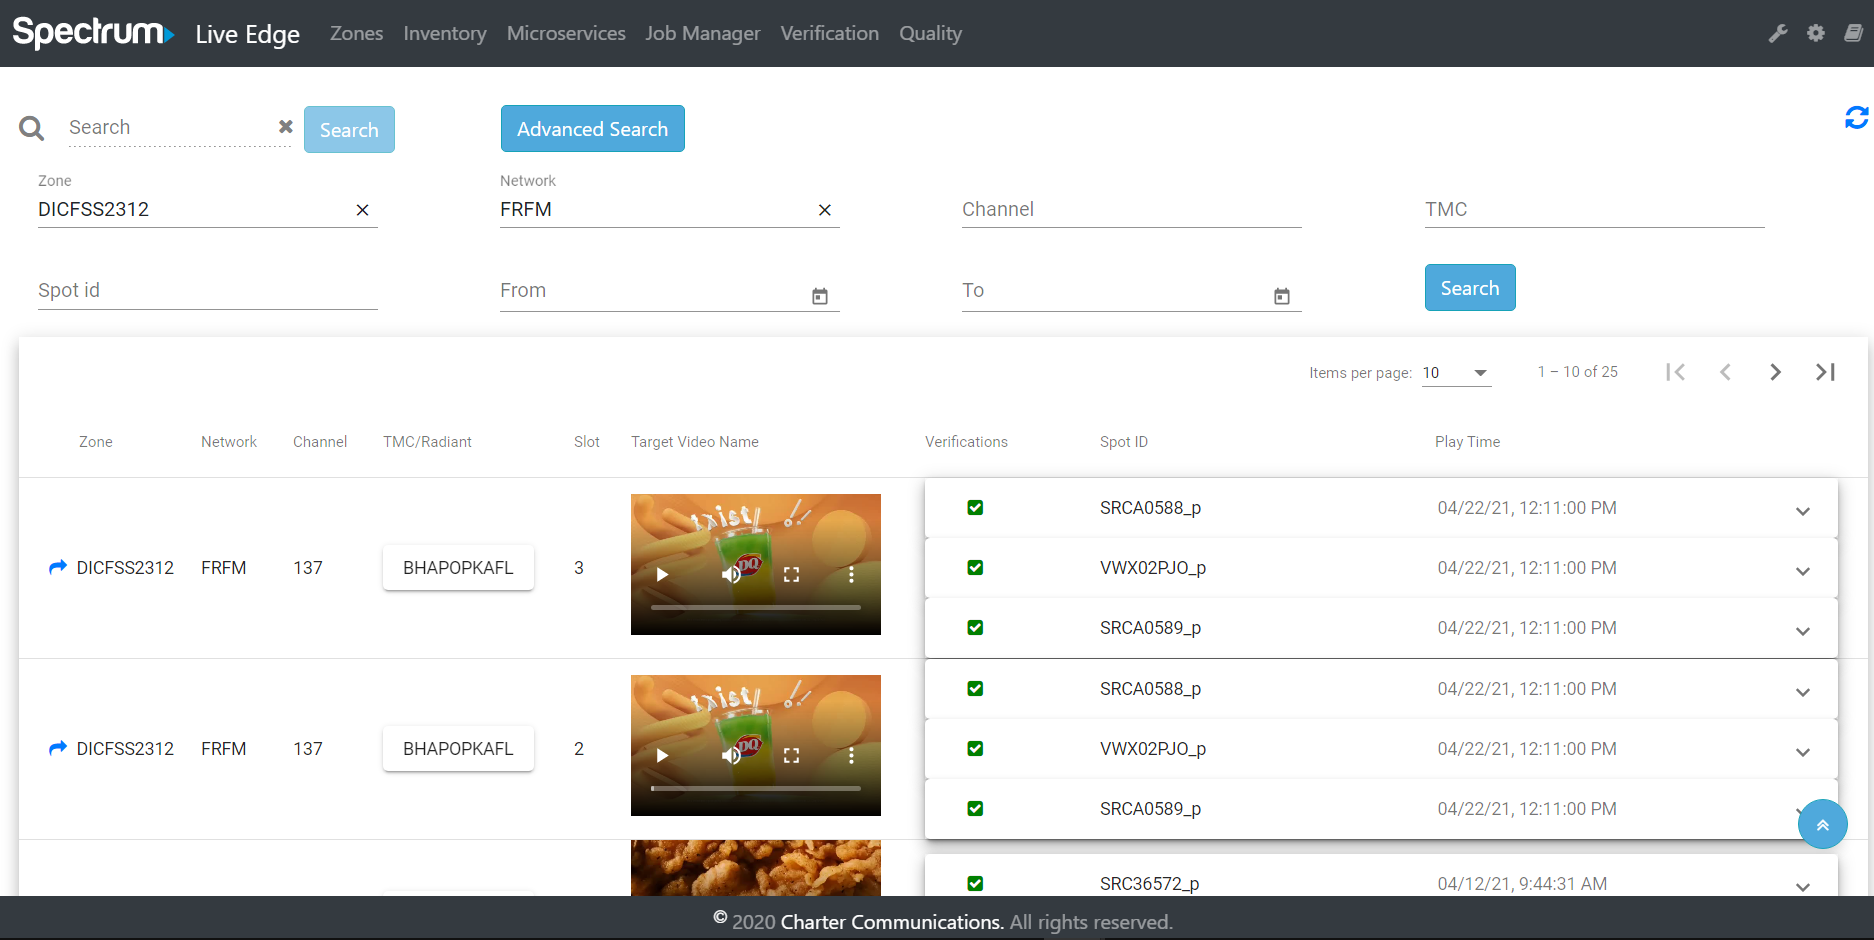
Status
They let the user know the status of the job in real-time.
- Status includes:
- Stopped
- Turning
- Playing
- Recording
- Recorded
- Error
Delete Job
Clicking the trash icon in the action column will confirm the user wishes to remove the job manager.
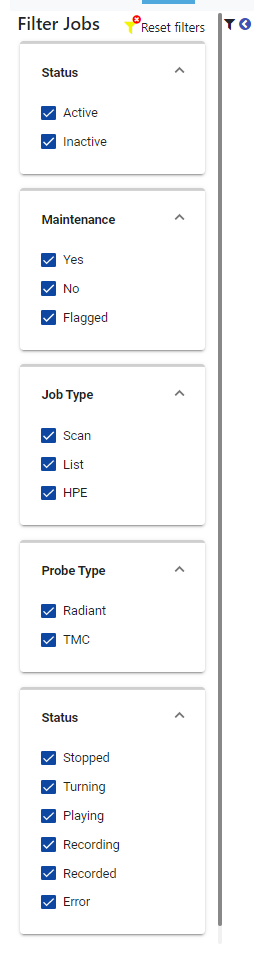
Filter Jobs
The Filter Jobs can be collapse or expand after clicking the filter icon on left-menu. It allows the user to filter jobs according to their active state.
Job Manager
Add Job
When clicking Add Job on the sub-navigation it will display a modal window allowing the user to add jobs.
This button only appears when accessing the Home page.
Generate Network List and Generate Channel Lineup button will appear after the user selecting the ZoneID and TMC/Radiant. They will automatically generate the Network List and Channel-Lineup after being clicked.
Click the Add button to add a new job, or Cancel to close the form without doing anything.

Adding an STVA Job
After selecting a “Probe Type” and “Probe” in the “Add Job Manager” interface, the “Slot ID - Make/Model” dropdown menu will automatically populate with device options based on the selected Probe. If the users selects a Roku device in the “Slot ID - Make/Model”, the “Channel Lineup” dropdown menu will automatically populate with “STVA Channel Lineup” options.
Edit Job
Jobs can be edited by clicking on the pencil icon in the action column of the job manager home view.
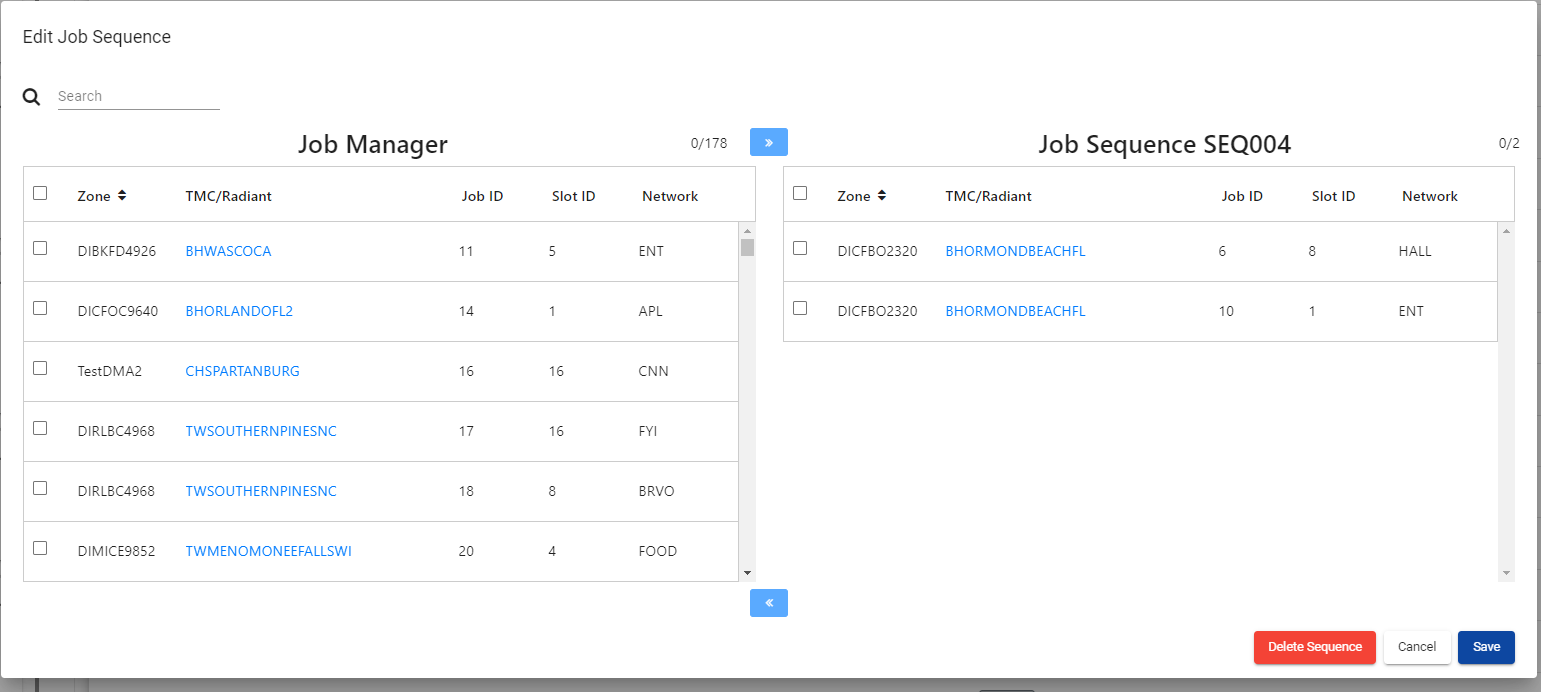
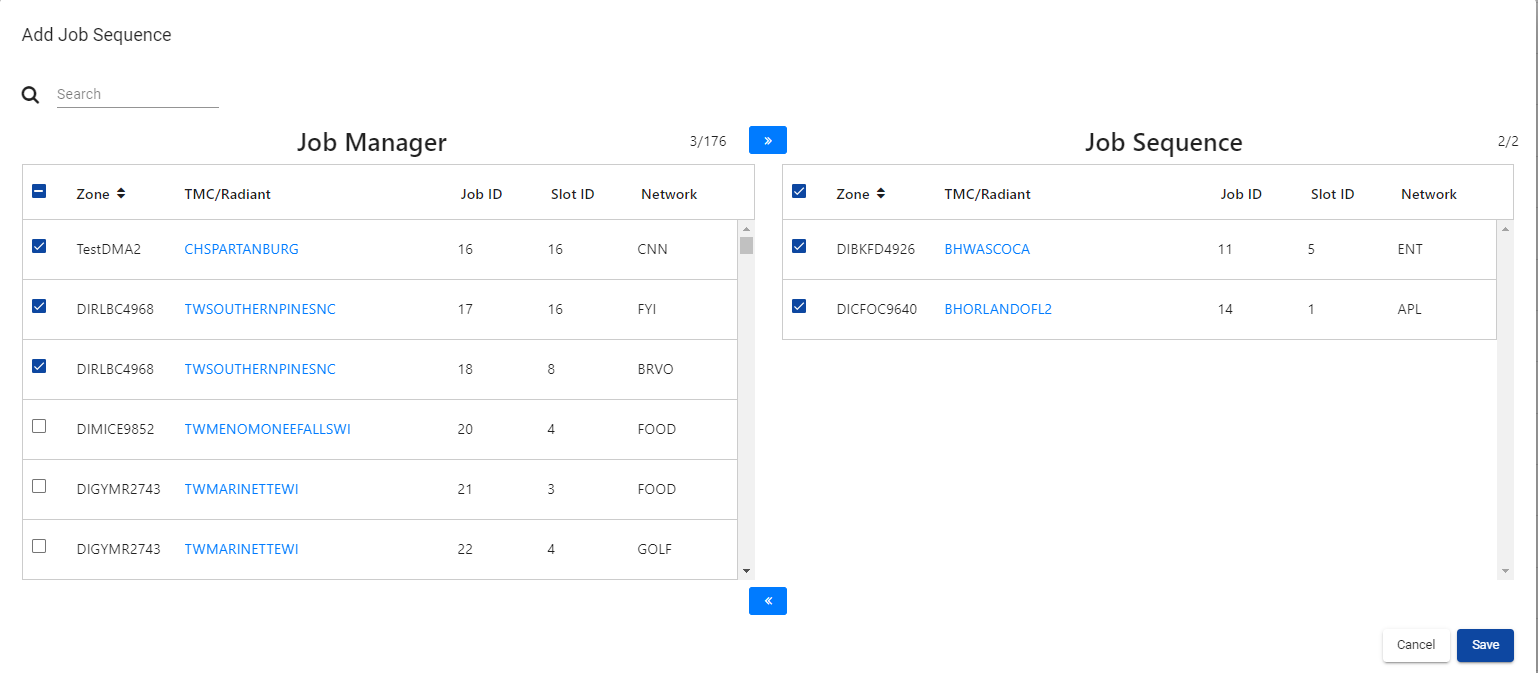
Job Sequence
The “Job Sequence” consists of an ordered list of many individual Jobs that will run sequentially in a series, one-at-a-time. When a Job in the Job Sequence completes, the next Job in the list will begin. Only one Job in the Job Sequence can run at a time.
Add Sequence
When clicking Add Sequence on the sub-navigation it will display a modal window allowing the user to Add Job Sequence.
This button only appears when accessing the Home page.
The “Add Sequence Modal” will display a list of all existing Jobs in a card on the left of the page - 1 Job has only one Sequence. Once the Job is in a sequence and has a Sequence ID, it’ll no longer display in the “Job Manager” List on the left panel.
User can add job(s) to Job Sequence by clicking right arrow (>) button or drag and drop action.
Jobs counter (Job Manager) decreased based on the selected and total of job in the list.
Jobs counter (Job Sequence) increased based on the selected and total of jobs.
“Job Sequence” list to reorder the list. The order that the Jobs are arranged in the “Job Sequence” list represents the order that they will execute when the Job Sequence is started.
A “Search” field at the top of the Job list on the left card so that users can quickly and easily locate particular Jobs to add into the “Job Sequence”. User can search for job(s) in the Job Manager list by Zone ID, TMC/Radiant, Job ID, Slot ID, Network.
No data changed when user clicking on Cancel button.
Job Sequence required at least 2 individual jobs.
After saving, sequenced jobs will have the same Sequence ID with the index appended to the end of each job. The index will reflect the order of the jobs in the Job Sequence list, and jobs will be executed by that order.
Edit Sequence
User can access the Edit Job Sequence modal when clicking on the “Sequence ID” of a job that has a “Sequence ID” in Job Manager Home.
The “Edit Job Sequence” modal will behave identically to the “Add Job Sequence” modal and the only difference is it will load the “Sequence List” with the Jobs and ordering associated to that particular “Sequence ID”.
User can delete the SequenceID when clicking the Delete Sequence button.