Dashboard
Dashboard
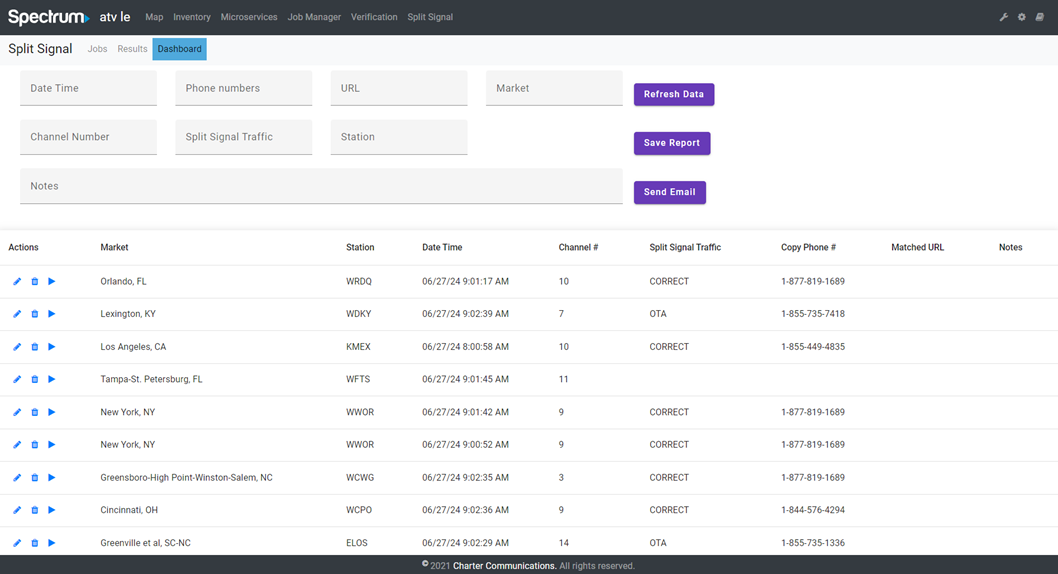
The Dashboard page provides users with an overview of job metadata, as well as options to create, save, and email reports.
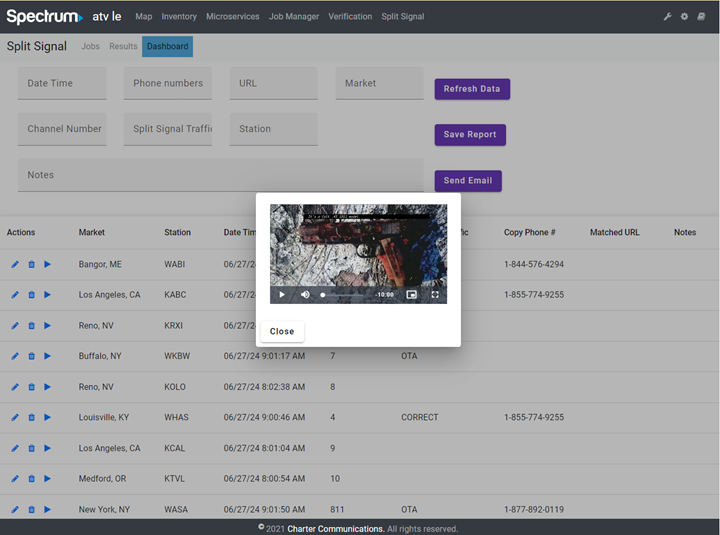
Each row in the table represents a specific video result with several columns providing different details.
- Market: The market associated with the result.
- Station: The station where the video was captured.
- Date Time: The date and time when the video was captured.
- Channel #: The channel number where the video was captured.
- Split Signal Traffic: CORRECT (if it is a “Split Signal” Spot type), Over The Air.
- Copy Phone #: The matched phone number.
- Matched URL: The matched URL.
- Notes: Any additional notes associated with the result.
Actions:
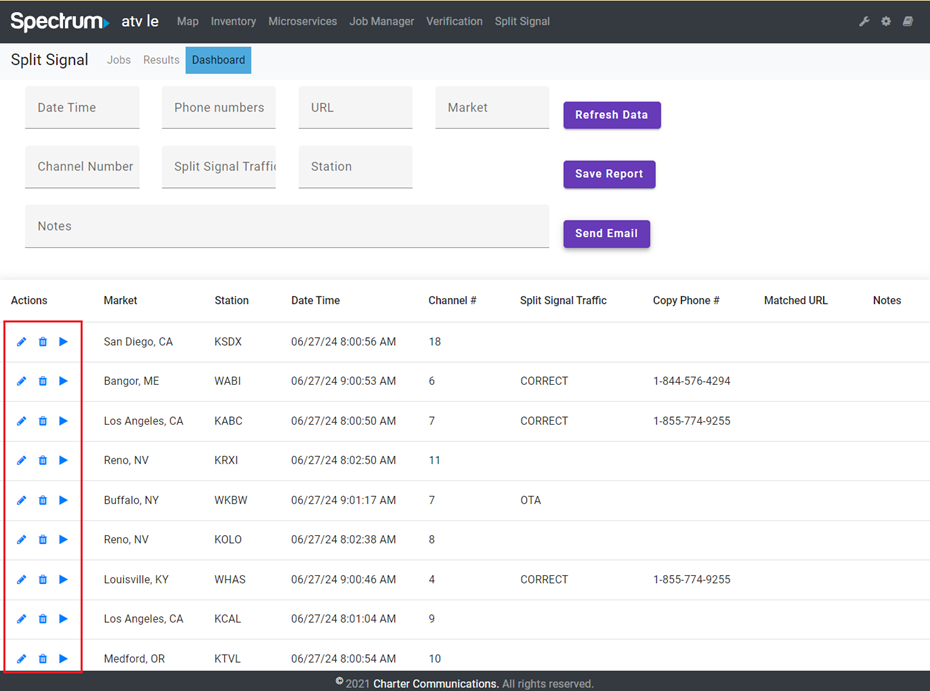
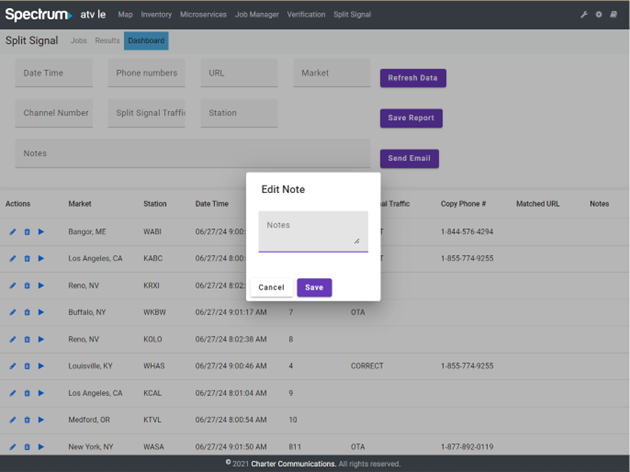
Edit icon: Click to open the "Edit note" modal where users can add or modify notes for the job.
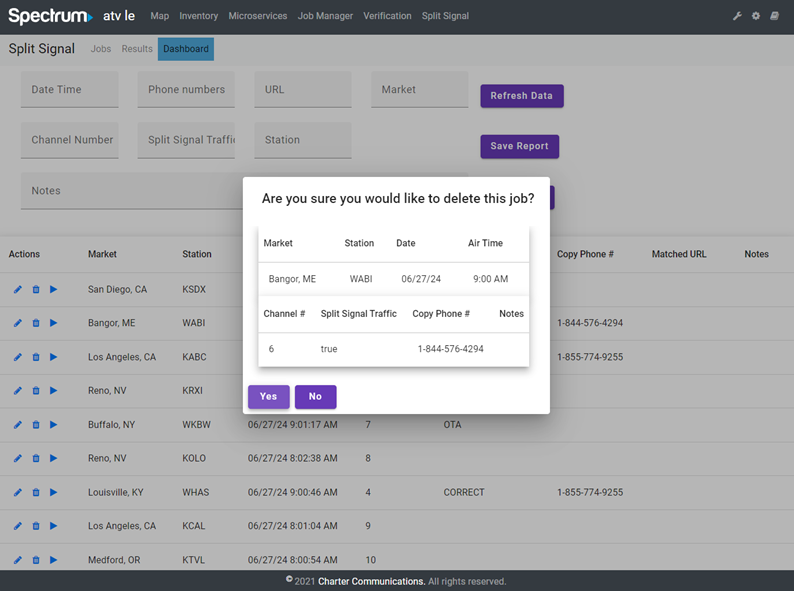
Delete icon: Click to delete the job data. A confirmation modal will appear to confirm the action.
Play icon: Click to open a video player and watch the captured video for the job.
Filter Fields: Users can search by these fields for more specific results.
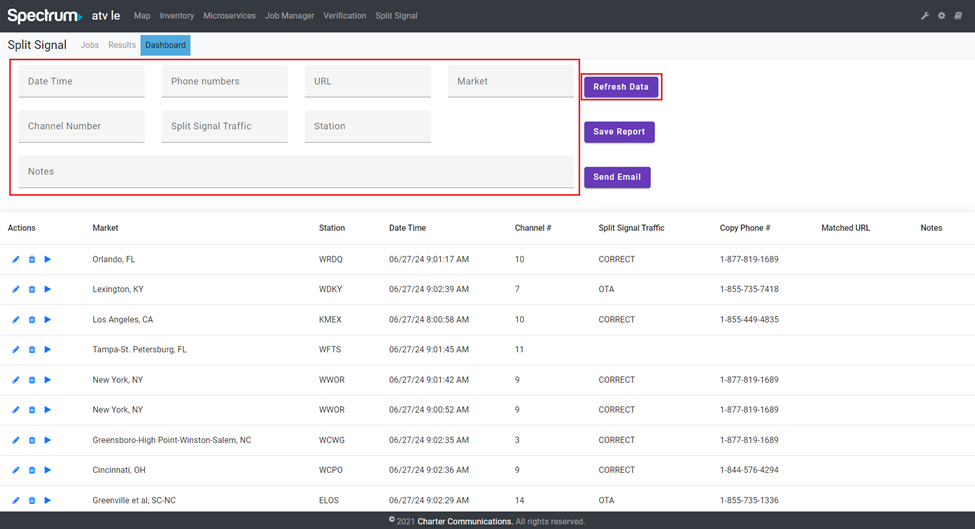
Once users fill in the fields, click the “Refresh Data” button and the related data will be displayed in the table below.
Save report
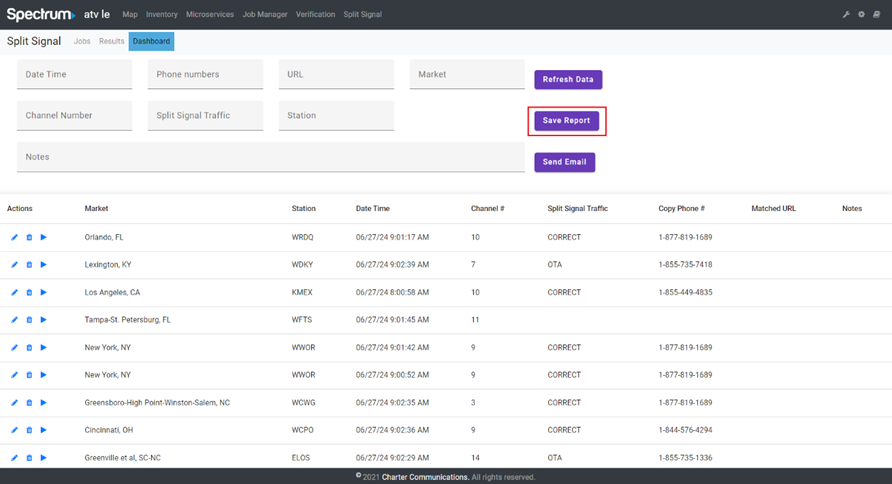
After filtering the results if needed, click the "Save Report" button to generate and download a report based on the current data displayed. This report will be saved directly to user’s computer in the default download location.
Email report
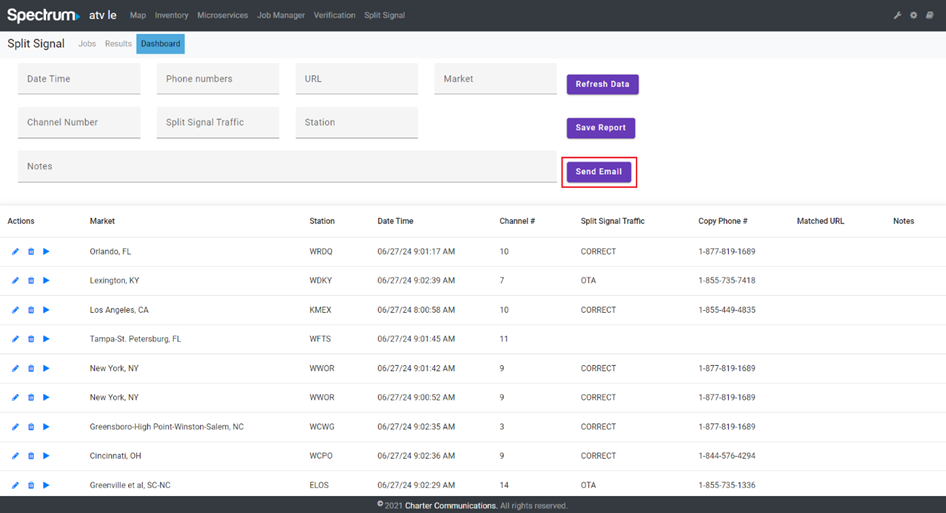
When clicked, this button opens a Save Report modal, prompting the user to fill in information to send the report via email.
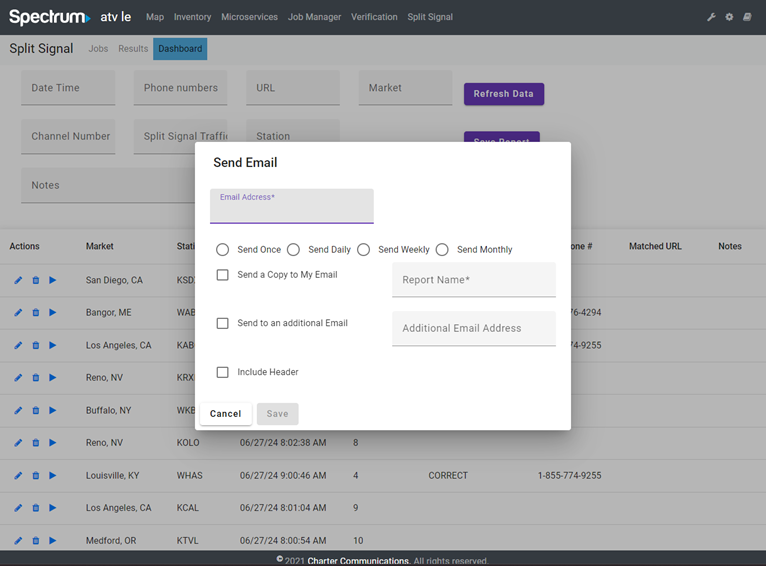
- Email Address: Enter the recipient's email address in this field. This is a required field.
- Send Once, Send Daily, Send Weekly, Send Monthly radio buttons: Choose the frequency with which you want to send the report.
- Send a Copy to My Email: Check this box if you want to receive a copy of the report in your email.
- Report Name: Enter a name for the report. This is also a required field.
- Send to an Additional Email: Check this box to send the report to another email address.
- Additional Email Address: If the above option is selected, enter the additional email address here.
- Include Header: Check this to include the header in the report.